

.svg)
.svg)
.svg)
.svg)

November 30, 2018
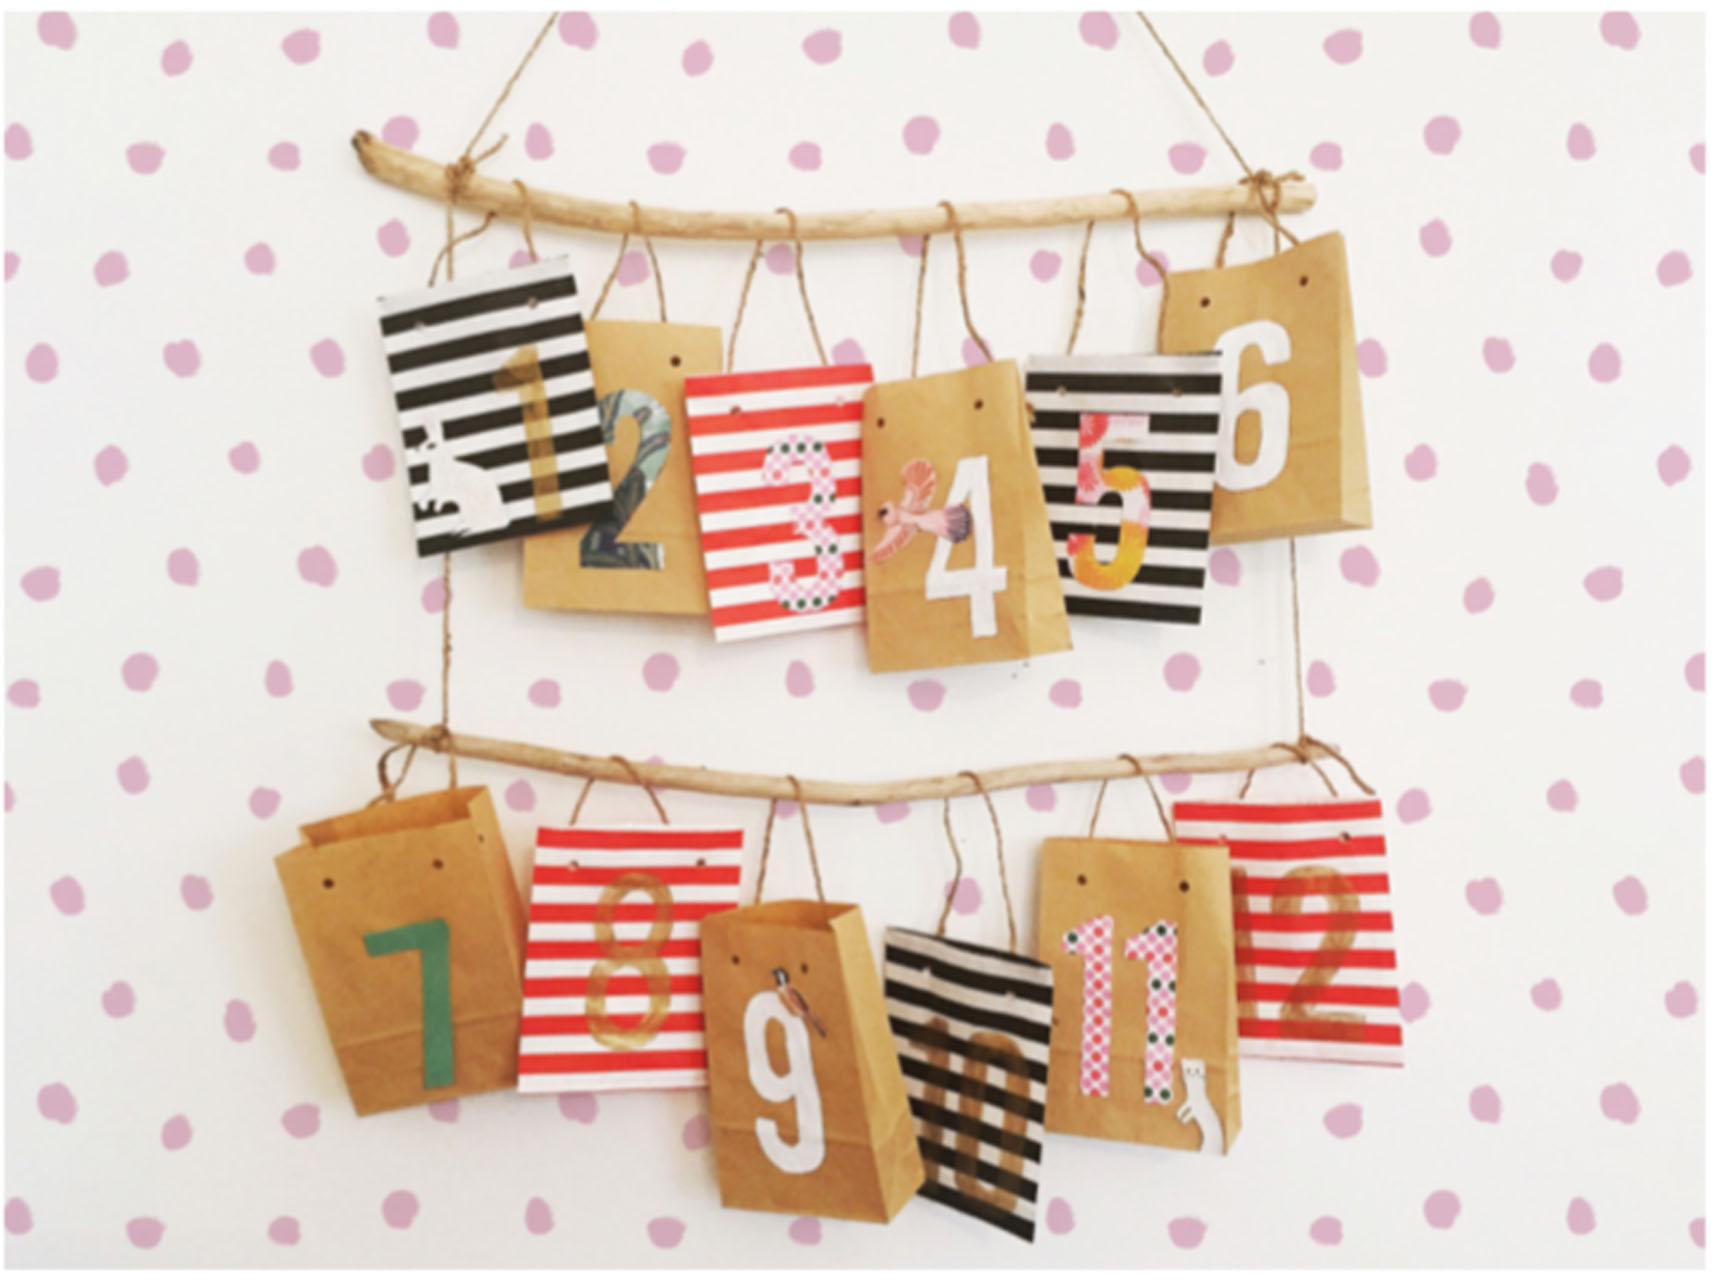
This cute take on the classic countdown is made with simple supplies—small paper or fabric bags, branches or dowel, and some pretty string or twine. The best part? You get to choose special gifts and treats to tailor the experience for your littles.
1. Trim branches or dowel to your desired length (for the full 3 1/2 week-calendar, you’ll need three lengths of wood). If you’re buying the dowel at a hardware store, they will usually cut it for you for free.
2. Cut two to three feet of twine and tie each end to the side of the first branch or dowel. Cut two more pieces of twine, about a foot each, to tie the second branch or dowel to the first. If adding a third row, repeat with two more pieces of twine and the remaining branch or dowel.
3. Decorate each bag, and poke two holes in the top for closure. Cut a 10-inch piece of twine for each bag, and knot through one hole.
4. Fill bags with treats, small toys and mini books. Then, tie each bag on to the dowels by knotting through the second hole, in whichever order you prefer. To reuse next year, replace the twine on each bag.
You don’t need to start the calendar on December 1, if 25 days feels too long. A 10-day or 14-day countdown is just as exciting, and less work for mom and dad.
Originally published in the Winter 2018 issue.

.svg)
.svg)
.svg)
.svg)
Website Powered by The Influence Agency ![]()


.svg)
.svg)

