Food
4 min Read
Amy Bronee’s Raspberry Cocoa Jam

September 8, 2015
Food
4 min Read

September 8, 2015


If you have any raspberries left in the yard – or there are end-of-summer flats for sale at the farmers’ market, or you managed to squirrel a few bags away in the freezer, a batch of raspberry cocoa jam will make back to school lunches that much sweeter.
Popular food blogger-turned-cookbook author Amy Bronee‘s first book, The Canning Kitchen, holds your hand through first preserving projects, and reminds us that they don’t require vast quantities of produce and an entire afternoon in the kitchen. Small-batch canning is the way to go, allowing for a quick batch of jam, pickles or chutney whenever you find yourself with fruit or veggies in season (or about to go wrinkly) and a short window to prepare them in. We’ve even started making jam and preserves as an after school project; it’s fun for kids to get involved in, and you wind up with a stash of homemade gifts for them to share with teachers and coaches when an opportunity arises.

This raspberry cocoa jam is brilliant – chocolate and raspberries are a classic combination, and will elevate your morning toast (or PB&J) to new heights.
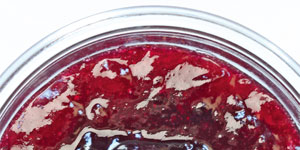
Raspberry Cocoa Jam
Classic raspberry jam gets a sinful twist with pure cocoa powder. Share spooned onto brownies and topped with whipped cream and chocolate shavings for a special dessert with someone you love, or whisk with a little dessert wine in a small saucepan until warm and pour over chocolate gateau. You’ve never had a jam like this before. Excerpted from The Canning Kitchen by Amy Bronee.
MAKES SEVEN 250 ML (1 CUP) JARS
2 1/2 lb (1.125 kg) raspberries
1 tbsp (15 mL) lemon juice
¼ cup (60 mL) pure cocoa powder
1 package (57 g) regular pectin powder
6 cups (1.5 L) granulated sugar
Rinse the raspberries under cool running water and drain well. Crush the berries in a large, heavy-bottomed pot with a masher (you should have just about 5 cups/1.25 L of crushed berries).
Stir in the lemon juice, cocoa powder and pectin powder. Bring to a full boil over high heat, stirring frequently. Stir in the sugar. Return to a full boil, stirring constantly. Maintain a full boil for 1 minute. Remove from the heat. Skim off and discard any foamy scum.
Ladle into 7 clean 250 mL (1 cup) jars, leaving a 1/4inch (5 mm) headspace.
Be sure to fill your canner with water and place it over high heat at least 20 minutes before you need it so it will be boiling when the jars are ready to be processed.
Follow the manufacturer’s instructions on the packaging for preparing lids for processing. Position new flat lids over the clean jar rims and secure in place by twisting on the screw bands just until fingertip tight. Not too tight—some air will need to escape during processing.
Place jars in water bath canner, covered by at least 1-inch (2.5 cm) boiling water. Cover canner and process for 15 minutes. Start timing when water in canner returns to full boil. When the processing time is up, turn off the heat and remove the lid. Leave the jars in the canner for 5 more minutes.
Remove processed jars from the canner and leave to cool for 12 to 24 hours. Do not tighten the screw bands while the jars are cooling. Once the jars are fully cooled, press the middle of each lid to check for a vacuum seal. If the centre of the lid is suctioned down, your jar has fully sealed.
TIP Milk products aren’t safe for water bath canning, so it’s important to use a pure cocoa powder that has no added milk solids. Look for one that lists only cocoa power in the ingredients.